For some time now, these pages are no longer created with a CMS but with a static site generator. I’m using Hugo, an ultra-fast generator written in Go. Hugo generates a web page from some layout and Markdown files. What I’m missing in Hugo, is a way to auto-generate OpenGraph images. A small NodeJS script fills this gap.
OpenGraph Images
The small preview images make a shared link much more interesting. Whether in social networks or now also in various messengers, the OpenGraph protocol is taken into account. But the manual creation of these images costs time and makes extra work, which I’d like to avoid.
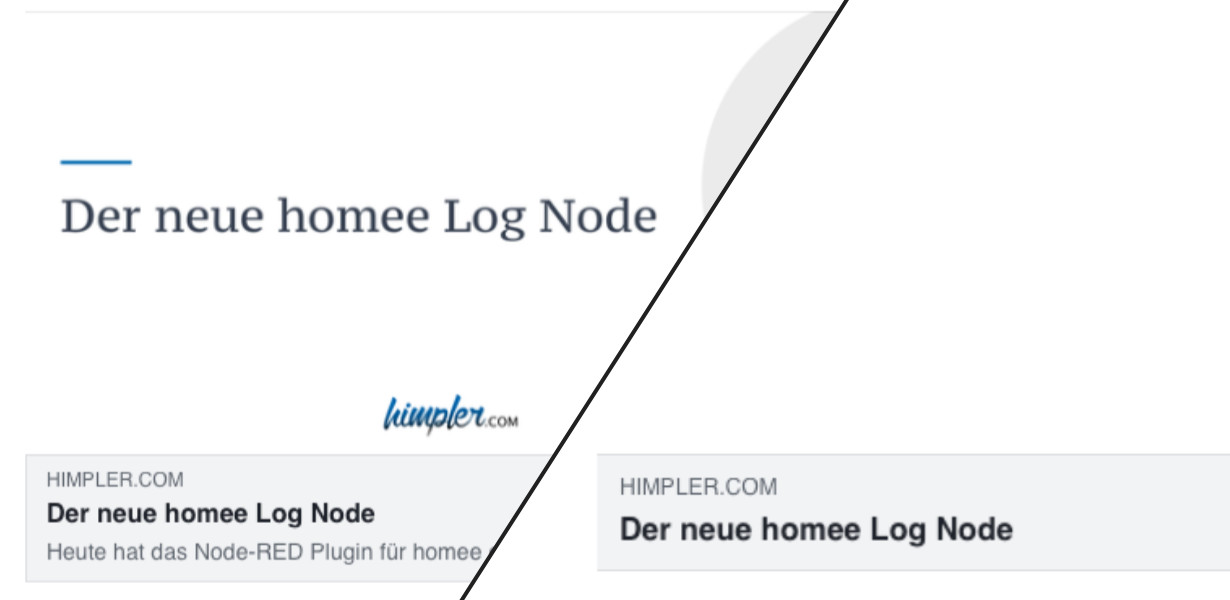
Facebook OpenGraph preview with and without an image
So, I need an automated solution. It would be obvious to generate the OG images with Go due to the build process of Hugo. But since Hugo currently can’t handle plugins I use a small NodeJS script as an alternative.
Create Images with NodeJS
Browsers already have a way to create images using JavaScript and a canvas element. With NodeJS you have to rely on an external package. I’m using canvas, which offers the same functionalities as its browsers’ counterpart.
After the package installation (npm install canvas), we are ready to go. But first, let’s take a look at my requirements:
- Detecting the available blog posts
- Reading the titles from the files
- Creating and saving the OpenGraph image
Let’s first take care of detecting the individual posts. Hugo uses a folder structure that can be read with onboard NodeJS tools.
const fs = require('fs');
const path = require('path');

const dir = path.join(__dirname, 'content/posts');

fs.readdir(dir, (err, files) => {
  files.forEach((folder) => {
    const stat = fs.statSync(`${dir}/${folder}`);
    if (stat && stat.isDirectory()) {
      process.stdout.write(`${folder}\n`);
    }
  });
});
This script prints a list of all subfolders of the posts directory. Each of these folders contains an index.md file with the content of the post. Besides the text, the file includes also some metadata, like the title or some tags. This extra information follows the front matter standard. We could create a regular expression to read this information. But this is much easier with another package. Gray-matter reads the front matter data of a file and returns it in JSON format. After installation (npm install gray-matter) we extend our script as follows:
const fs = require('fs');
const matter = require('gray-matter');
const path = require('path');

const dir = path.join(__dirname, 'content/posts');

fs.readdir(dir, (err, files) => {
  files.forEach((folder) => {
    const stat = fs.statSync(`${dir}/${folder}`);
    if (stat && stat.isDirectory()) {
      const { data: post } = matter.read(`${dir}/${folder}/index.md`);
      process.stdout.write(`${post.title}\n`);
    }
  });
});
Now we have the correct folder paths of the posts as well as their titles. So, we can start with the creation of the OpenGraph image. To match my site design, I’ve created a small template in the appropriate format.

Basic Template for the OpenGraph image
The next part shows the function to create a 1200x630px canvas element and import the template as the background image.
const { createCanvas, loadImage } = require('canvas');

const generateOgImage = async (title, tags, dest) => {
  const canvas = createCanvas(1200, 630);
  const context = canvas.getContext('2d');

  const baseImage = await loadImage(path.join(__dirname, 'static/images/og-image-base.png'));
  context.drawImage(baseImage, 0, 0, width, height);
}
Next, we add the title from the front matter params to the image and store it as PNG-File.
const generateOgImage = async (title, tags, dest) => {

  // [...]

  registerFont(
    path.join(__dirname, 'static/fonts/pt-serif-caption-v9-latin-regular.ttf'),
    { family: 'PT Serif Caption' },
  );

  context.fillStyle = '#374151';
  context.font = '64px PT Serif Caption';

  context.fillText(title, 50, 90);

  const buffer = canvas.toBuffer('image/png');
  fs.writeFileSync(path.join(dest, 'feature-image.png'), buffer);
};
After selecting a font and the font size, the text is written to the canvas. Afterwards, we save the generated image in the folder of the current post. Hugo searches for specific file names (more on that below), which is why I call the image feature-image.png.
Line break in the canvas element
After the first test run, we have some images, but the look does not fit yet. Among other things, there is no automatic line break in the Canvas element for long text.

The text doesn’t fit because of the missing line break
You can add a maximum width as a third parameter, but this results in the text being compressed to the given width. So it’s completely useless for my purpose and I need a custom function to achieve the desired result.
const { createCanvas, loadImage, registerFont } = require('canvas');

// [...]

const maxWidth = 900;
const lineHeight = 90;
const paddingLeft = 50;

const words = title.split(' ');
let line = '';
let y = lineHeight;
const headlines = [];

words.forEach((w, i) => {
  const testLine = `${line}${w} `;
  const metrics = context.measureText(testLine);
  if (metrics.width > maxWidth && i > 0) {
    context.fillText(line, paddingLeft, y);
    line = `${w} `;
    y += lineHeight;
  } else {
    line = testLine;
  }
});
context.fillText(line, paddingLeft, y);

// [...]
First, we break the title down into words and loop through them. In each iteration, we use the canvas function measureText() to calculate the line width. The result is compared with the maximum width (here 900px). If the maximum width is not yet reached, we add another word to the current line. If we exceed the maximum width, the line is written to the canvas and the current word starts with a new line. At the same time, we increase the Y position of the line. In the end, the remaining words are also written to the canvas.

Line breaks for the post title
Another test shows that the title is now wrapped. But the positioning does not yet suit me.
Positioning the text in the canvas
I want to display the text vertically centered. The centering depends on the number of lines we created before. Since we don’t know the number of lines while writing them to the canvas, we need to adjust the function again.
// [...]

let y = lineHeight / 2;
const headlines = [];

words.forEach((w, i) => {
  const testLine = `${line}${w} `;
  const metrics = context.measureText(testLine);
  if (metrics.width > maxWidth && i > 0) {
    headlines.push({ text: line, y });
    line = `${w} `;
    y += lineHeight;
  } else {
    line = testLine;
  }
});
headlines.push({ text: line, y });

// [...]
We adapt the function so that it stores the lines together with the calculated Y position in an array. The length of the array is then the number of lines. We use this information together with the total height of the title to calculate an offset. This offset determines the start of the first line.
// [...]

	const startPosY = (height - (lineHeight * headlines.length)) / 2;
	headlines.forEach((l) => context.fillText(l.text, paddingLeft, startPosY + l.y));

// [...]

Positioned Headline
To get as close as possible to the look of my blog’s headlines, we’ll add a simple rectangle at the top left above the headline.
// [...]

context.fillStyle = '#006cb0';
context.fillRect(paddingLeft, startPosY - (lineHeight / 2) - 10, 100, 5);

// [...]
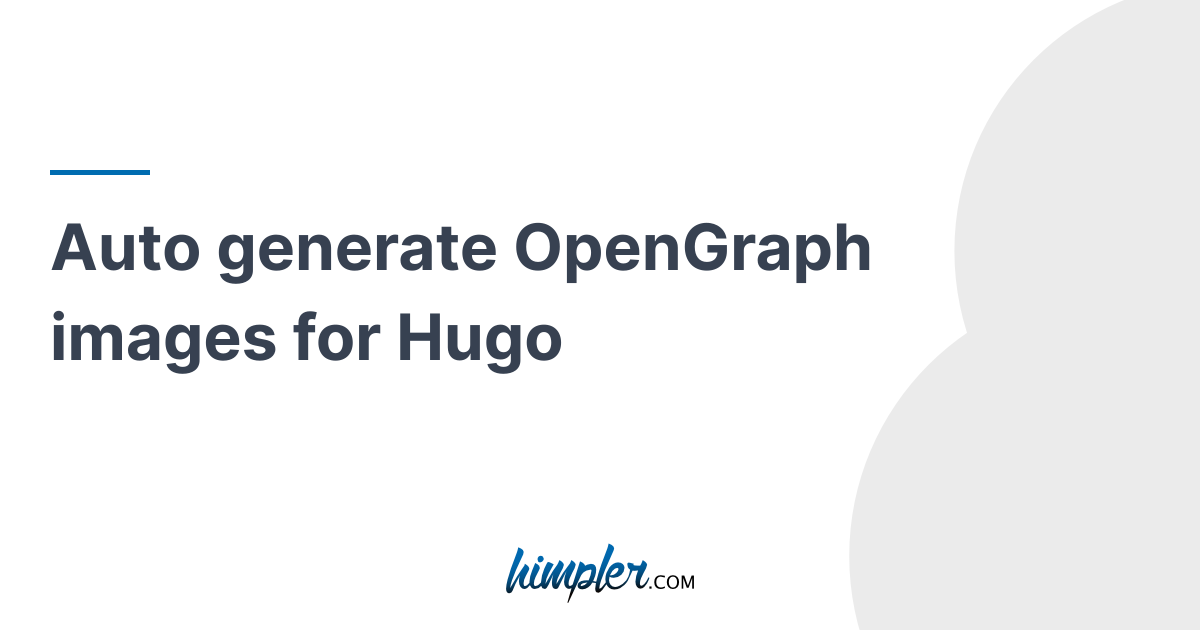
The generated OG image for this post
Including the OG images in Hugo
Last but not least we need to include the generated images on our site. Hugo provides a template, that we need to include in the <head></head>. The template displays the front matter params as OpenGraph schema.
<head>
  <!-- [...] -->
  {{ template "_internal/opengraph.html" . }}
  {{ template "_internal/twitter_cards.html" . }}
</head>
This is where the selected file name of the OG images comes into play. By default, Hugo searches for images whose filenames contain *feature*, *cover* or *thumbnail*. If there is a match, the image is used as an OG image. Otherwise, we can specify an image path (to the static folder) in our front matter params. More about this in the Hugo documentation. You’ll find there a list with supported properties of the OpenGraph schema, too. Finally, you should check the results with a tool like the Sharing Debugger from Facebook.
Bonus: Multilanguage
Since I want to publish some posts additionally in English (this blog is currently mostly in German), the OpenGraph images should also be delivered with the English headline. I organize my multilingual posts in the same folder. They differ only in the file name. The default index.md then becomes index.en.md. The same scheme can be applied to the OG images. So we extend the script to create an English version of the image, which is saved as feature-image.en.png. Thanks to Hugo’s language recognition, the English language OG image is then delivered with the English language post.
// [...]

try {
  await fileExists(`${dir}/${folder}/index.en.md`);
  const { data: enPost } = matter.read(`${dir}/${folder}/index.en.md`);
  generateOgImage(enPost.title, enPost.tags, `${dir}/${folder}/feature-image.en.png`);
  process.stdout.write('✔');
} catch (error) {
  process.stdout.write('x');
}
The principle here is the same as for the German-language graphics: If an English variant of the post exists, the function is called with the respective English parameters. For the distinction of the file name the function generateOgImage is extended by a third parameter. You can find the whole script after the short summary.
tl;dr
With the following NodeJS script, you can create OpenGraph images for Hugo. In the first step, the script searches for your posts and extracts the needed information. In the second step, the OG image is created based on a given template. The script wraps headlines that are too long and places them centered in the template. I run the script manually; but it’s also possible to automate this, e.g. with a Github workflow.
const { createCanvas, loadImage, registerFont } = require('canvas');
const fs = require('fs');
const matter = require('gray-matter');
const path = require('path');

const width = 1200;
const height = 630;
const maxWidth = 900;
const lineHeight = 90;
const paddingLeft = 50;
const dir = path.join(__dirname, 'content/posts');

const fileExists = (filePath) => new Promise((resolve, reject) => {
  fs.access(filePath, fs.F_OK, (err) => {
    if (err) return reject(err);
    return resolve();
  });
});

const generateOgImage = async (title, tags, dest) => {
  const canvas = createCanvas(width, height);
  const context = canvas.getContext('2d');

  const baseImage = await loadImage(path.join(__dirname, 'static/images/og-base-image.png'));
  context.drawImage(baseImage, 0, 0, width, height);

  registerFont(
    path.join(__dirname, 'static/fonts/pt-serif-caption-v9-latin-regular.ttf'),
    { family: 'PT Serif Caption' },
  );

  context.fillStyle = '#374151';
  context.font = '64px PT Serif Caption';

  const words = title.split(' ');
  let line = '';
  let y = lineHeight / 2;
  const headlines = [];

  words.forEach((w, i) => {
    const testLine = `${line}${w} `;
    const metrics = context.measureText(testLine);
    if (metrics.width > maxWidth && i > 0) {
      headlines.push({ text: line, y });
      line = `${w} `;
      y += lineHeight;
    } else {
      line = testLine;
    }
  });
  headlines.push({ text: line, y });

  const startPosY = (height - (lineHeight * headlines.length)) / 2;
  headlines.forEach((l) => context.fillText(l.text, paddingLeft, startPosY + l.y));

  context.fillStyle = '#006cb0';
  context.fillRect(paddingLeft, startPosY - (lineHeight / 2) - 10, 100, 5);

  const buffer = canvas.toBuffer('image/png');
  fs.writeFileSync(path.join(dest), buffer);
};

process.stdout.write('generating images ');
fs.readdir(dir, (err, files) => {
  files.forEach(async (folder) => {
    const stat = fs.statSync(`${dir}/${folder}`);
    if (stat && stat.isDirectory()) {
      // german
      try {
        await fileExists(`${dir}/${folder}/index.md`);
        const { data: post } = matter.read(`${dir}/${folder}/index.md`);
        generateOgImage(post.title, post.tags, `${dir}/${folder}/feature-image.png`);
        process.stdout.write('✔');
      } catch (error) {
        process.stdout.write('x');
      }

      // english
      try {
        await fileExists(`${dir}/${folder}/index.en.md`);
        const { data: enPost } = matter.read(`${dir}/${folder}/index.en.md`);
        generateOgImage(enPost.title, enPost.tags, `${dir}/${folder}/feature-image.en.png`);
        process.stdout.write('✔');
      } catch (error) {
        process.stdout.write('x');
      }
    }
  });
});

